Blinds are window coverings made of slats or vanes that can be adjusted to control the amount of light and privacy in a room. They are typically made of materials like wood, faux wood, vinyl, aluminum, or fabric, and come in a range of colors and styles to match any decor.
Window Blinds also allow you to control the amount of natural light entering a room. You can adjust the angle and height of the slats to let in more or less light, which is useful for creating a comfortable and functional environment. Also, they help you save on heating and cooling costs by blocking out heat and cold from outside. This can be especially helpful during extreme weather conditions.
Overall, installing blinds can improve the functionality, comfort, and aesthetic appeal of your home or office. Installing blinds yourself can be a rewarding and cost-effective way to update the look of your windows. Here’s a step-by-step guide to help you install blinds like a pro:
Materials
The materials used in blind installation can vary depending on the type of blinds being installed and the method of installation. Here are some common materials that may be used:
Blinds
The blinds themselves are the main component of the installation, and they come in a variety of materials such as wood, faux wood, aluminum, vinyl, and fabric.
Mounting brackets
These are used to secure the blinds to the window frame or wall.
Screws
These are used to attach the mounting brackets to the window frame or wall.
Anchors
If the blinds are being mounted onto drywall, anchors may be necessary to provide additional support.
Drill
A drill is needed to make holes in the window frame or wall for the screws.
Screwdriver
A screwdriver is used to tighten the screws and attach the mounting brackets.
Level
A level is used to ensure that the blinds are installed evenly and straight.
Measuring tape
A measuring tape is used to determine the size of the window and the length of the blinds.
Pencil
A pencil is used to mark where the mounting brackets will be installed on the window frame.
Step 1: Measure Your Window
Use a measuring tape to determine the size of your window frame. Be sure to measure the width and height of the window to determine the correct size of blinds to purchase. Here are the steps to measure your windows:
Use a metal measuring tape: A metal measuring tape is the most accurate tool to measure the dimensions of your windows.
Measure the width of the window: Measure the width of the window from left to right. Measure at the top, middle, and bottom of the window frame, and record the narrowest measurement.
Measure the height of the window: Measure the height of the window from top to bottom. Measure at the left, center, and right of the window frame, and record the longest measurement.
Measure the depth of the window: Measure the depth of the window from the front of the window frame to the back of the window frame.
Repeat for multiple windows: If you are installing blinds or shades on multiple windows, be sure to measure each one separately, as windows can vary in size even in the same room.
It’s important to measure your windows accurately to ensure the blinds or shades you purchase fit properly and function as intended. If you’re unsure about measuring your windows, you may want to consult with a professional for assistance.
Step 2: Choose Your Mounting Brackets
Choosing the appropriate mounting brackets for your blinds is important to ensure they are properly installed and secure. Here are some steps to help you choose your mounting brackets:
Check the instructions: Many blinds come with mounting brackets included in the packaging, and the instructions will usually specify which brackets to use. If your blinds came with instructions, be sure to review them to determine which brackets are needed.
Consider the type of window frame: The type of window frame you have may affect the type of mounting brackets you need. For example, if you have a metal window frame, you may need special brackets designed for metal frames.
Determine the location of the blinds: Where you plan to install the blinds may also affect the type of mounting brackets you need. For example, if you are installing blinds on a wall or ceiling, you may need special brackets designed for that purpose.
Choose the appropriate size: Mounting brackets come in different sizes to accommodate different-sized blinds. Be sure to choose the appropriate size brackets based on the width and depth of your blinds.
Step 3: Install Mounting Brackets
Here are the steps to install mounting brackets:
Determine the location for the brackets. Use a level to ensure that the brackets will be straight.
Mark the location for the screws. Use a pencil or marker to mark the location where the screws will go.
Drill pilot holes: Use a drill bit that is slightly smaller than the screws you’ll be using to drill pilot holes in the marked locations. This will help prevent the material from splitting when you insert the screws.
Attach the brackets to the surface: Use a screwdriver or drill to insert the screws into the pilot holes and attach the brackets to the surface.
Double-check the level: Use a level to ensure that the brackets are still straight.
Test the brackets: Once the brackets are securely attached, test them to make sure they can support the weight of the object you’ll be placing on them.
Repeat for additional brackets: If you’re installing multiple brackets, repeat the above steps for each bracket.
With these steps, you should be able to install mounting brackets securely and safely.
Step 4: Attach Blinds to Brackets
Here are some general instructions on how to attach blinds to brackets:
Position the brackets: First, position the mounting brackets on the wall or window frame where you want to install the blinds. Make sure the brackets are level and evenly spaced.
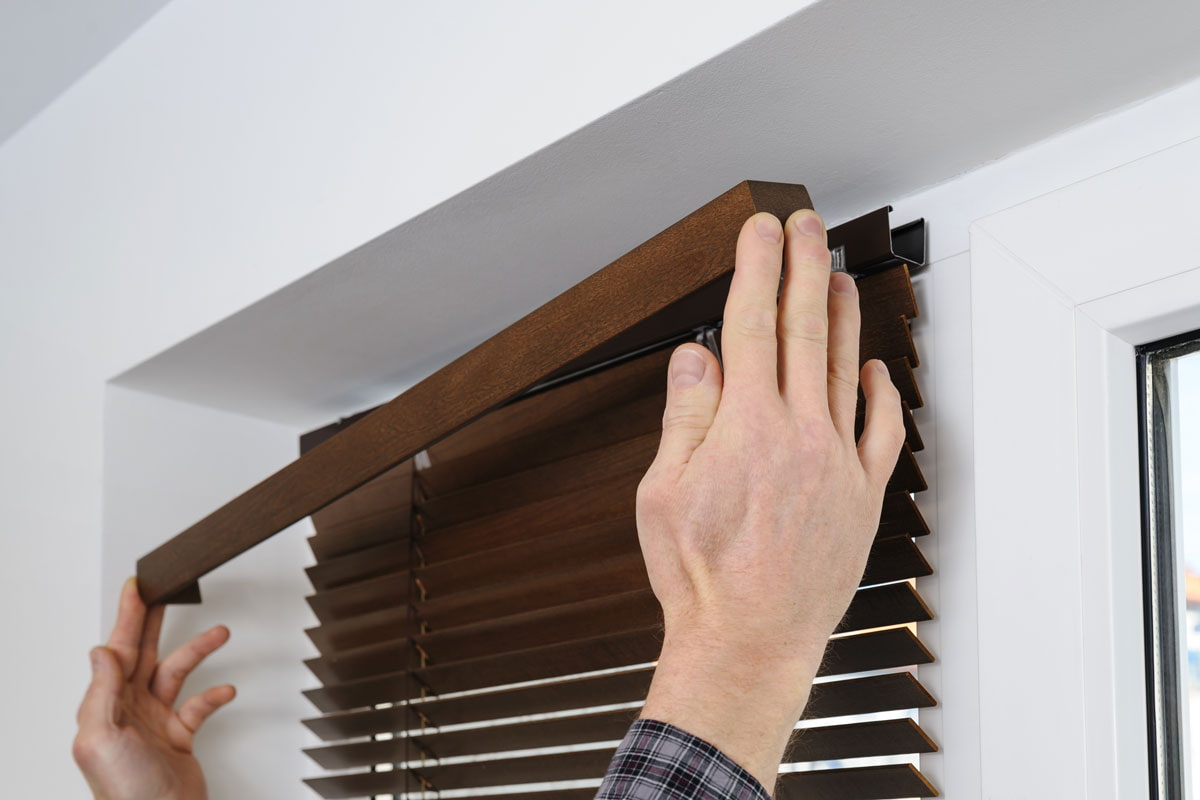
Insert the blind into the brackets: Next, insert the top of the blind into the brackets. Depending on the type of bracket, you may need to push the blind up into the bracket, or slide the blind into the bracket from the side.
Secure the blinds to the brackets: Once the blinds are in place, use the included screws to secure the brackets to the wall or window frame. You may need to adjust the blinds to ensure they are level before fully tightening the screws.
Test the blinds: Once the blinds are securely attached to the brackets, test the operation of the blinds by pulling on the cord or using the wand to adjust the slats.
It’s important to note that the specific steps for attaching blinds to brackets may vary depending on the type of blinds and brackets you are using. Always read the instructions that come with your blinds and brackets before attempting to install them. Additionally, make sure to follow any safety guidelines or precautions provided by the manufacturer.
Step 5: Adjust the Blinds
Here are some general instructions on how to adjust blinds:
Tilt the slats: To adjust the amount of light entering the room, you can tilt the slats of the blinds. Depending on the type of blinds you have, this may be done by twisting a wand or pulling a cord.
Raise or lower the blinds: To adjust the height of the blinds, you can raise or lower them. Depending on the type of blinds you have, this may be done by pulling a cord or using a wand.
Align the slats: If the slats are uneven or not level, you can adjust them by gently bending the bottom rail of the blinds. Use your hands to align the slats and make sure they are level.
Clean the blinds: Regular cleaning can help to keep your blinds in good condition and functioning properly. You can use a soft cloth or duster to remove any dust or debris from the slats.
Congratulations, you have successfully installed your blinds! Enjoy your newly updated windows.